Part 1: Setup and First Protection
This first part is a production-grade onboarding path.
Goal for this part:
- install SafeMode correctly
- complete certificate trust setup
- start monitor/proxy in correct order
- validate real blocking activity
1. Choose Installation Mode
Binary mode (recommended for operators)
Use this when you are not developing code:
- Open
https://github.com/misaelzapata/safemode/releases. - Download your OS artifact.
- Install and launch.
Source mode (recommended for contributors)
Use this when you need tests, debugging, or code updates:
python3 -m venv .venv
source .venv/bin/activate
python -m pip install --upgrade pip
python -m pip install -r requirements.txt
PYTHONPATH=src python -m url_monitor
2. Understand the Real Startup Lifecycle
On startup, SafeMode performs multiple backend initializations:
- settings load (
data/settings.json) - database initialization (
data/url_monitor.db) - worker thread startup for alert queue handling
- filter manager bootstrapping
- certificate readiness gate
Important runtime guarantee:
- if certificate trust is missing, SafeMode explicitly asks you to resolve it before relying on HTTPS inspection.
3. Complete Certificate Setup
Certificate trust is mandatory for meaningful HTTPS visibility.
Guided path (inside app)
- Start app.
- In certificate modal, click Install now.
- Approve OS trust prompts.
- Click Recheck until cert status is valid.
Manual fallback path
- Enable Monitor + Proxy.
- Open
http://mitm.itin browser. - Install the local certificate chain.
- Return to SafeMode and recheck state.
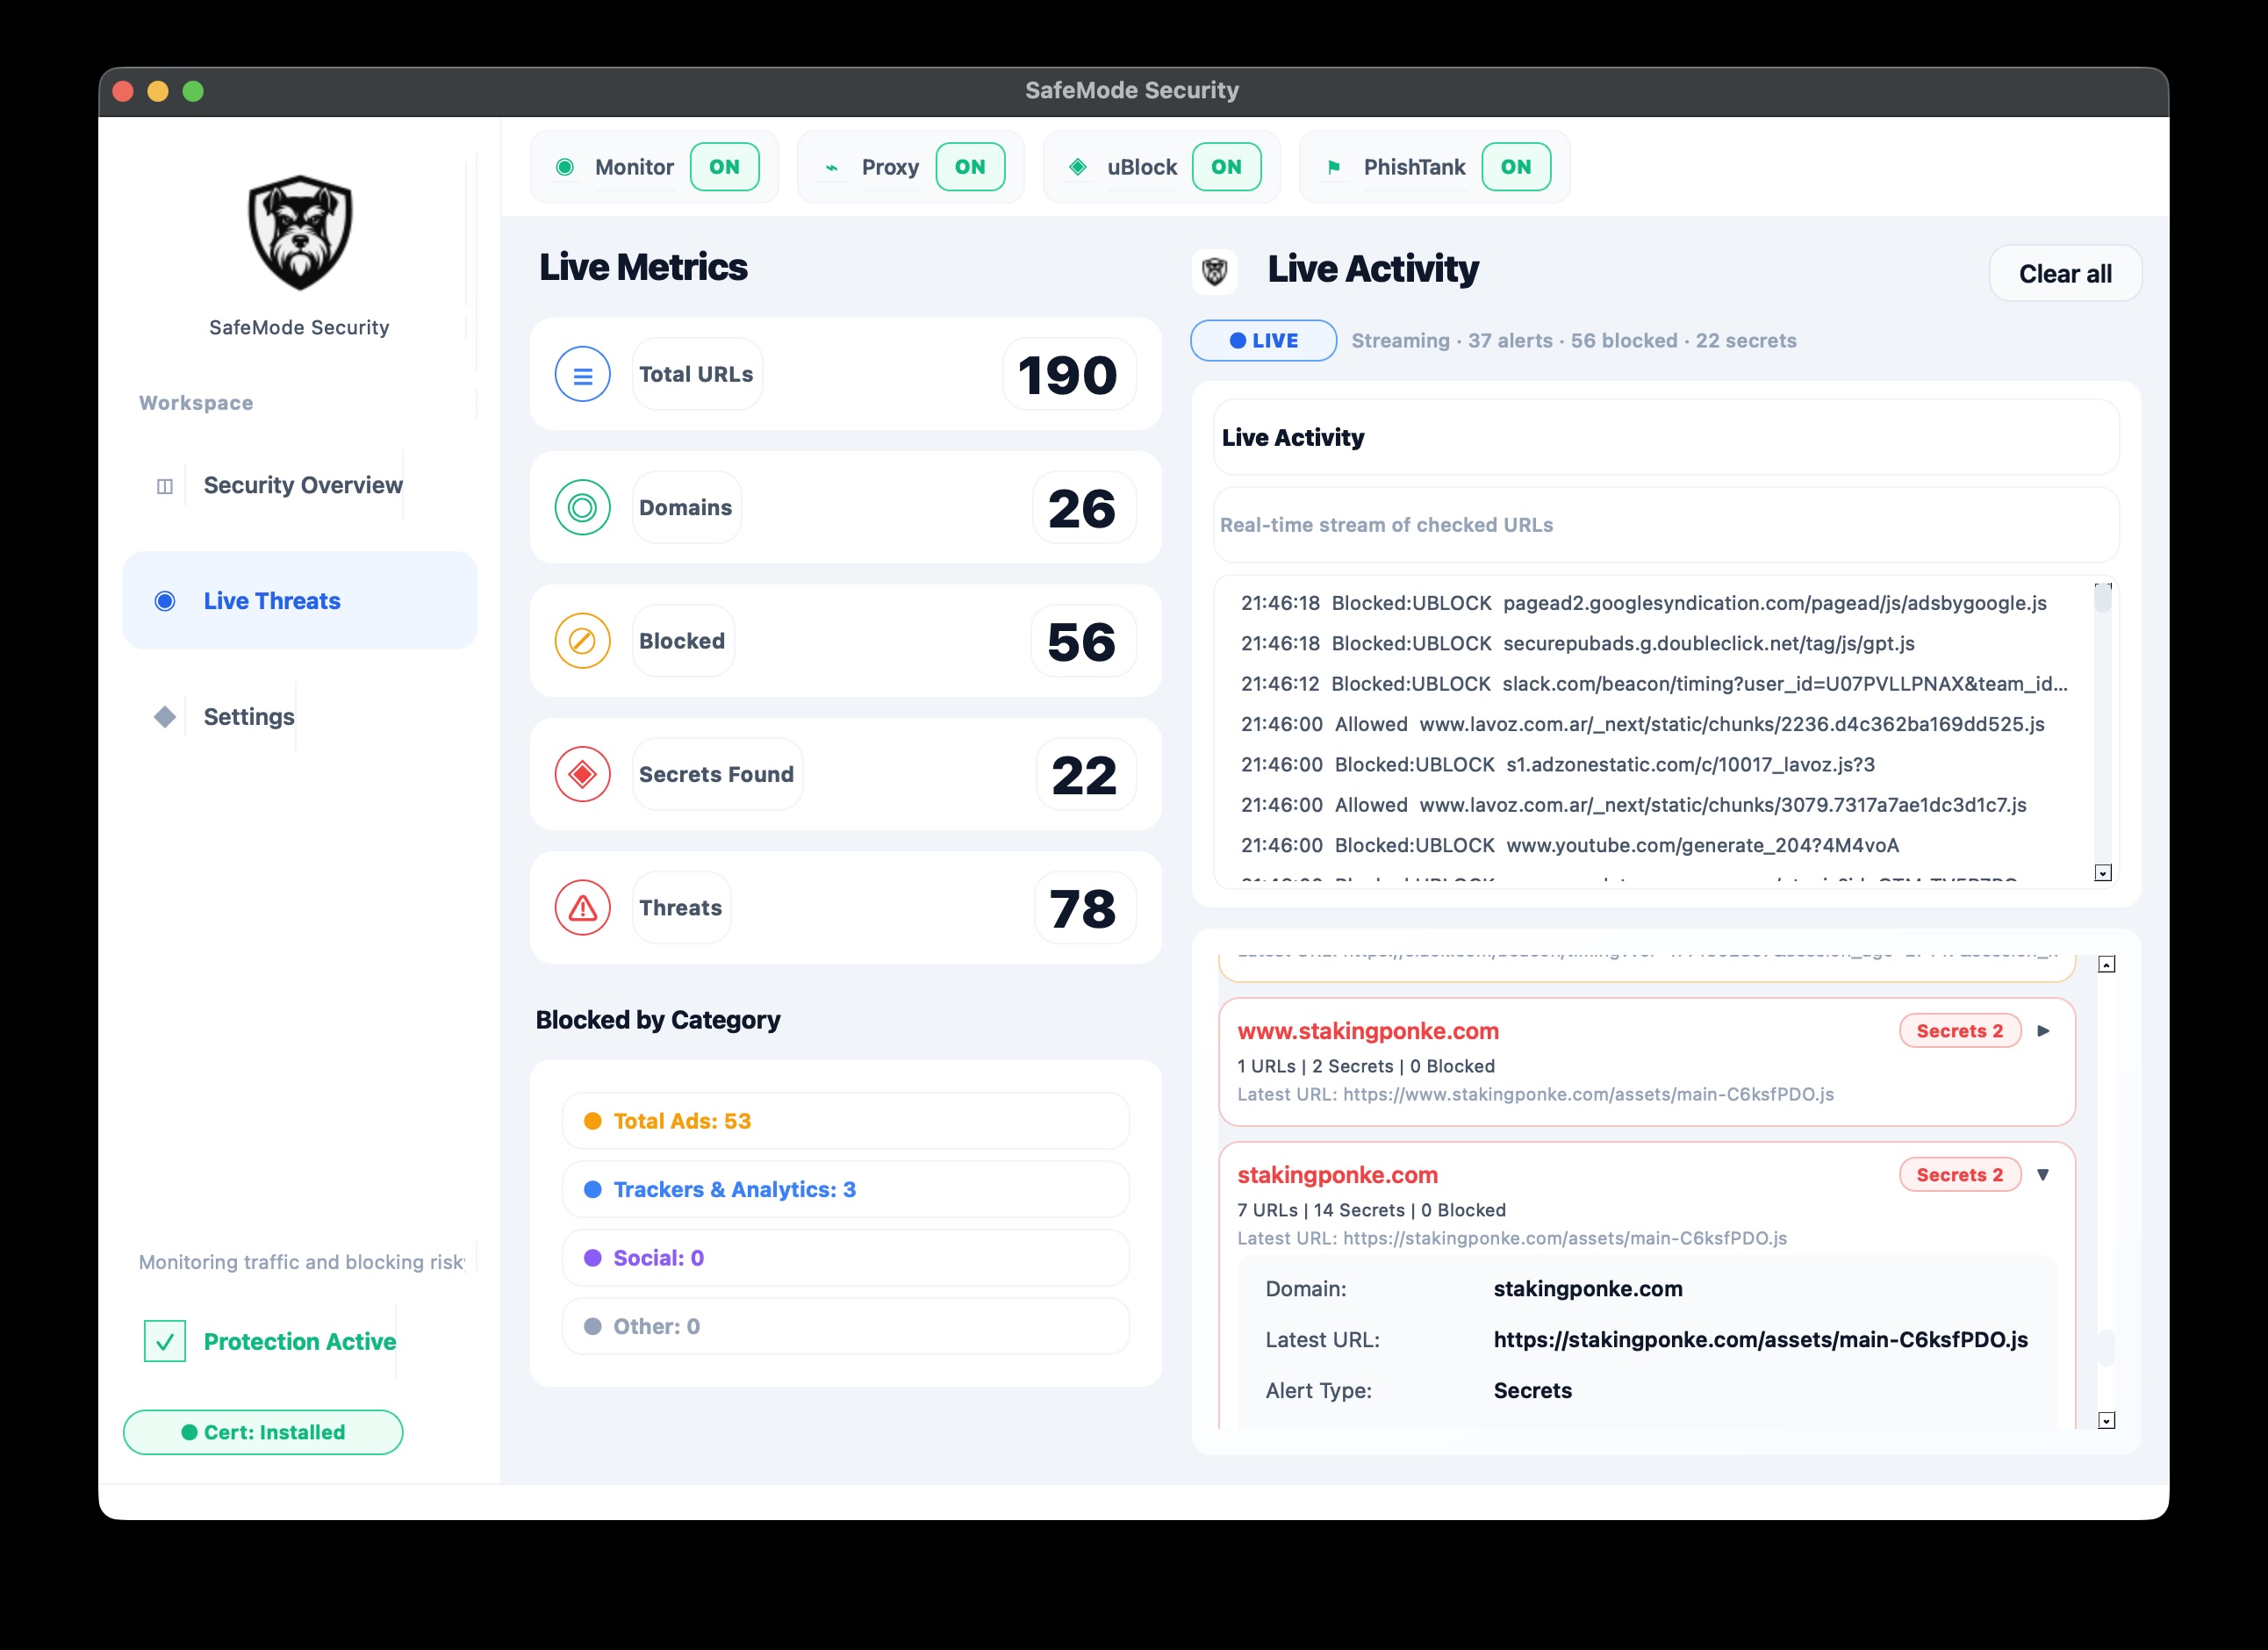
4. Start Protection the Correct Way
When you toggle Monitor ON in Live Threats:
- mitmproxy process starts.
- child process loads filters.
- READY signal is emitted.
- system proxy is enabled.
If proxy enable fails after READY, monitor is intentionally stopped.
That behavior is a safety mechanism to avoid fake "ON" status.
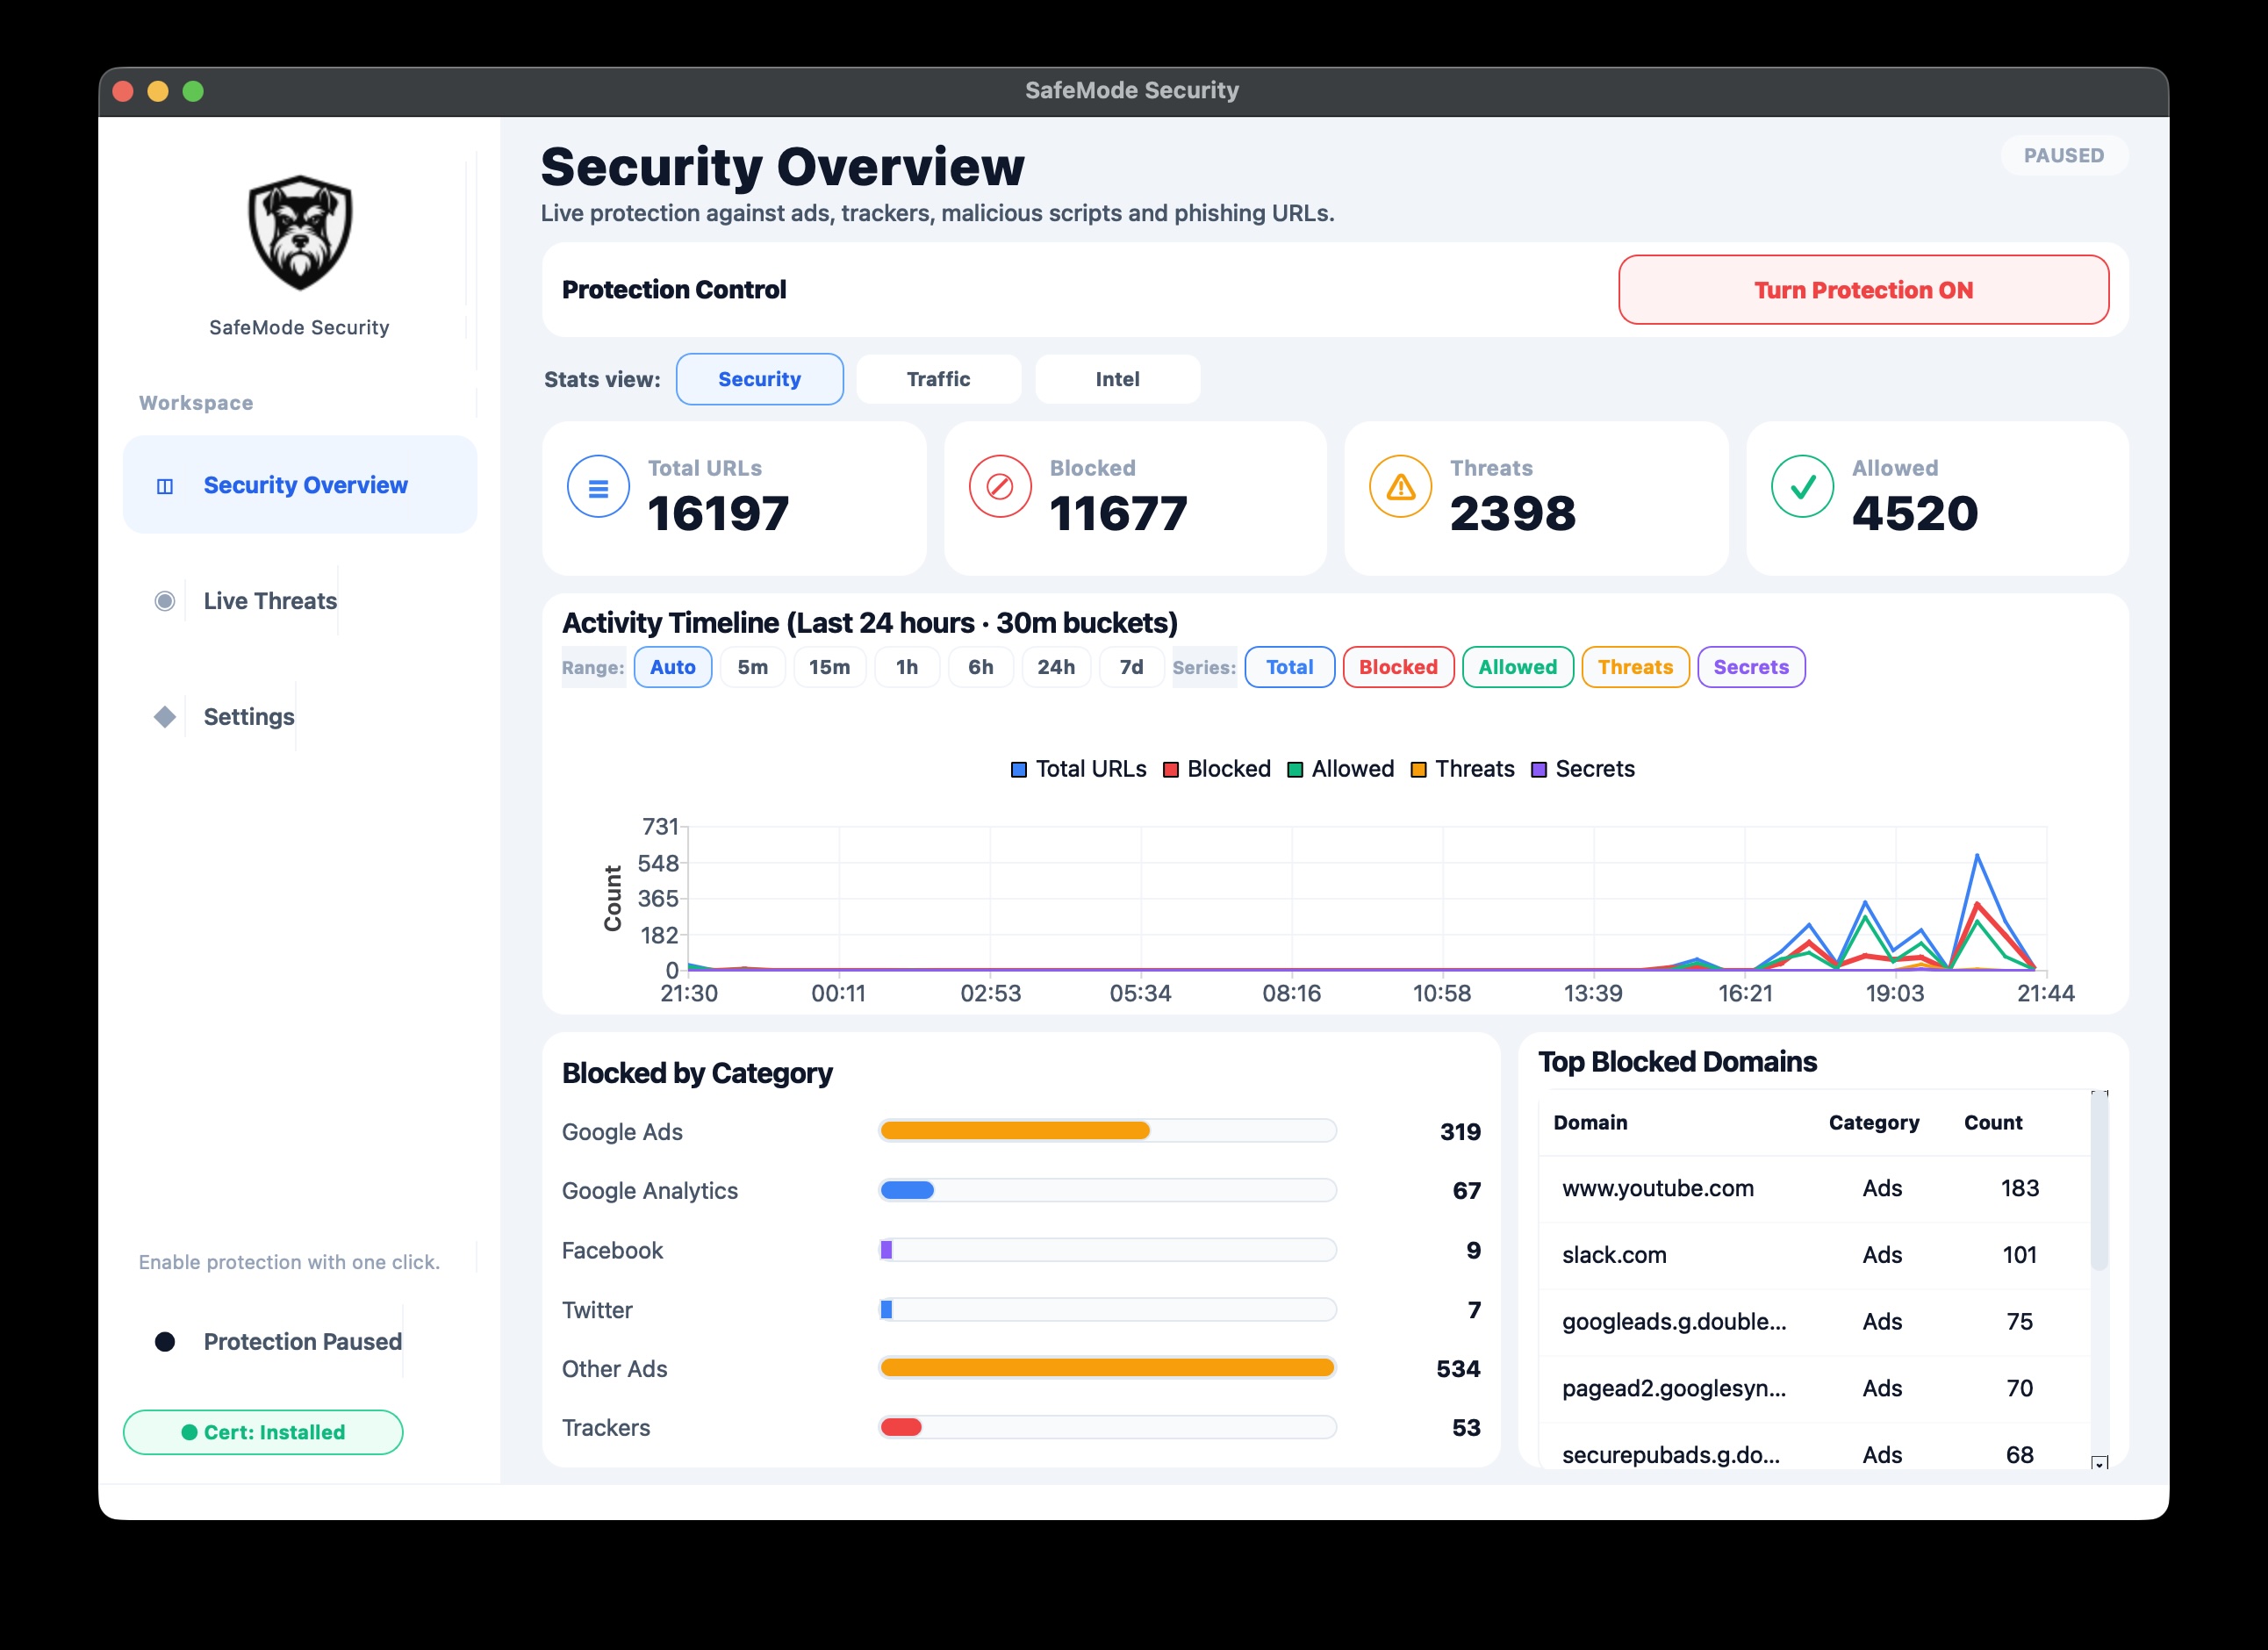
5. Validate with Real Traffic
Run this exact checklist:
- Open Live Threats panel.
- Confirm
MonitorandProxypills are ON. - Visit a normal ad-heavy page.
- Confirm blocked events appear.
- Expand at least one alert card.
- Confirm domain/reason/category fields are meaningful.
Expected early reasons:
ublock- possibly
phishtankif you hit known malicious URLs
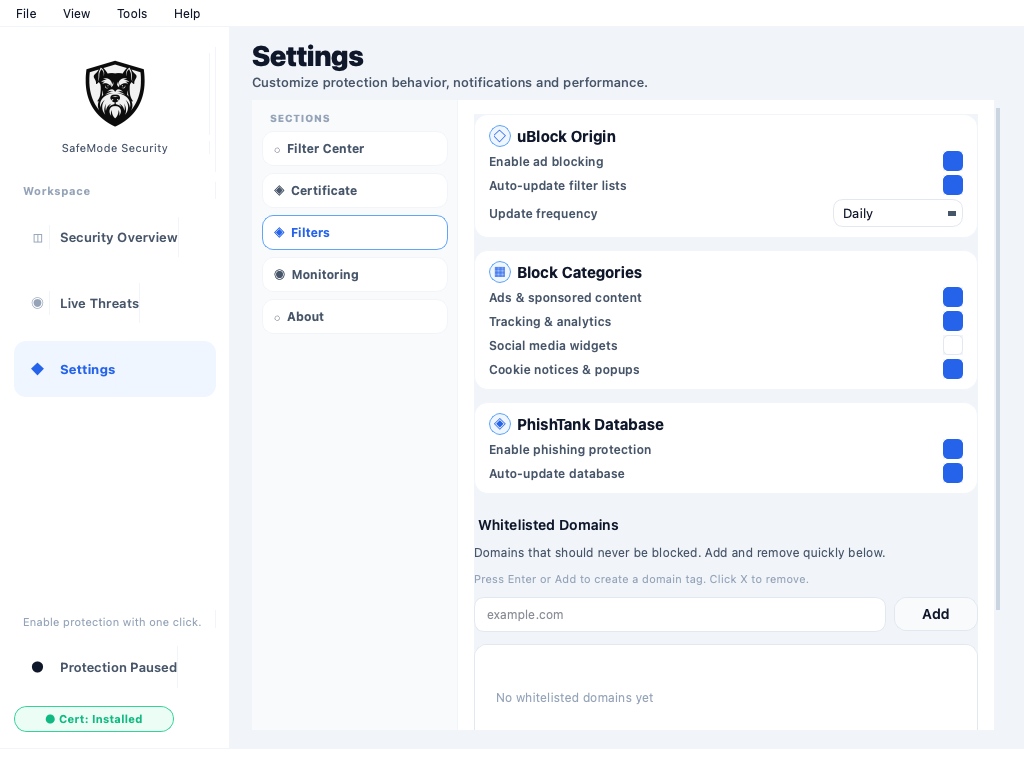
6. First-Day Security Baseline
After first successful run, check settings baseline:
- phishing protection enabled
- ad/tracker protection enabled
- critical notification channels enabled
- auto-update enabled for feeds
- suspicious JS mode at least
balanced
7. First-Run Troubleshooting
Problem: Browser says certificate not private
- root cause: cert not trusted
- action: reinstall and trust cert again
Problem: Monitor says ON but no events
- root cause: proxy not active or no routed traffic
- action: verify proxy status pill and OS proxy state
Problem: Startup is fine but internet breaks
- root cause: potential overblocking or proxy misconfiguration
- action: stop monitor, verify connectivity, then isolate by filter engine
8. Record Your Environment
Before continuing to Part 2, record:
- OS/version
- install mode (binary/source)
- certificate install method
- first successful validation timestamp
This makes later troubleshooting much faster.
Next
Continue to Part 2: Filters and Allowlist.